A messy office can drag down productivity and make team morale sink fast, and the hidden costs are bigger than you might think. Studies show that the average employee loses up to 4.3 hours each week just searching for misplaced documents or supplies. Most people assume a quick tidy-up is all it takes to fix the problem, but that approach barely scratches the surface. By taking a systematic, strategic path to decluttering, you can uncover workspace potential you never knew you had.
Table of Contents
- Step 1: Assess Your Office Space For Clutter
- Step 2: Create A Cleanout Plan With Specific Goals
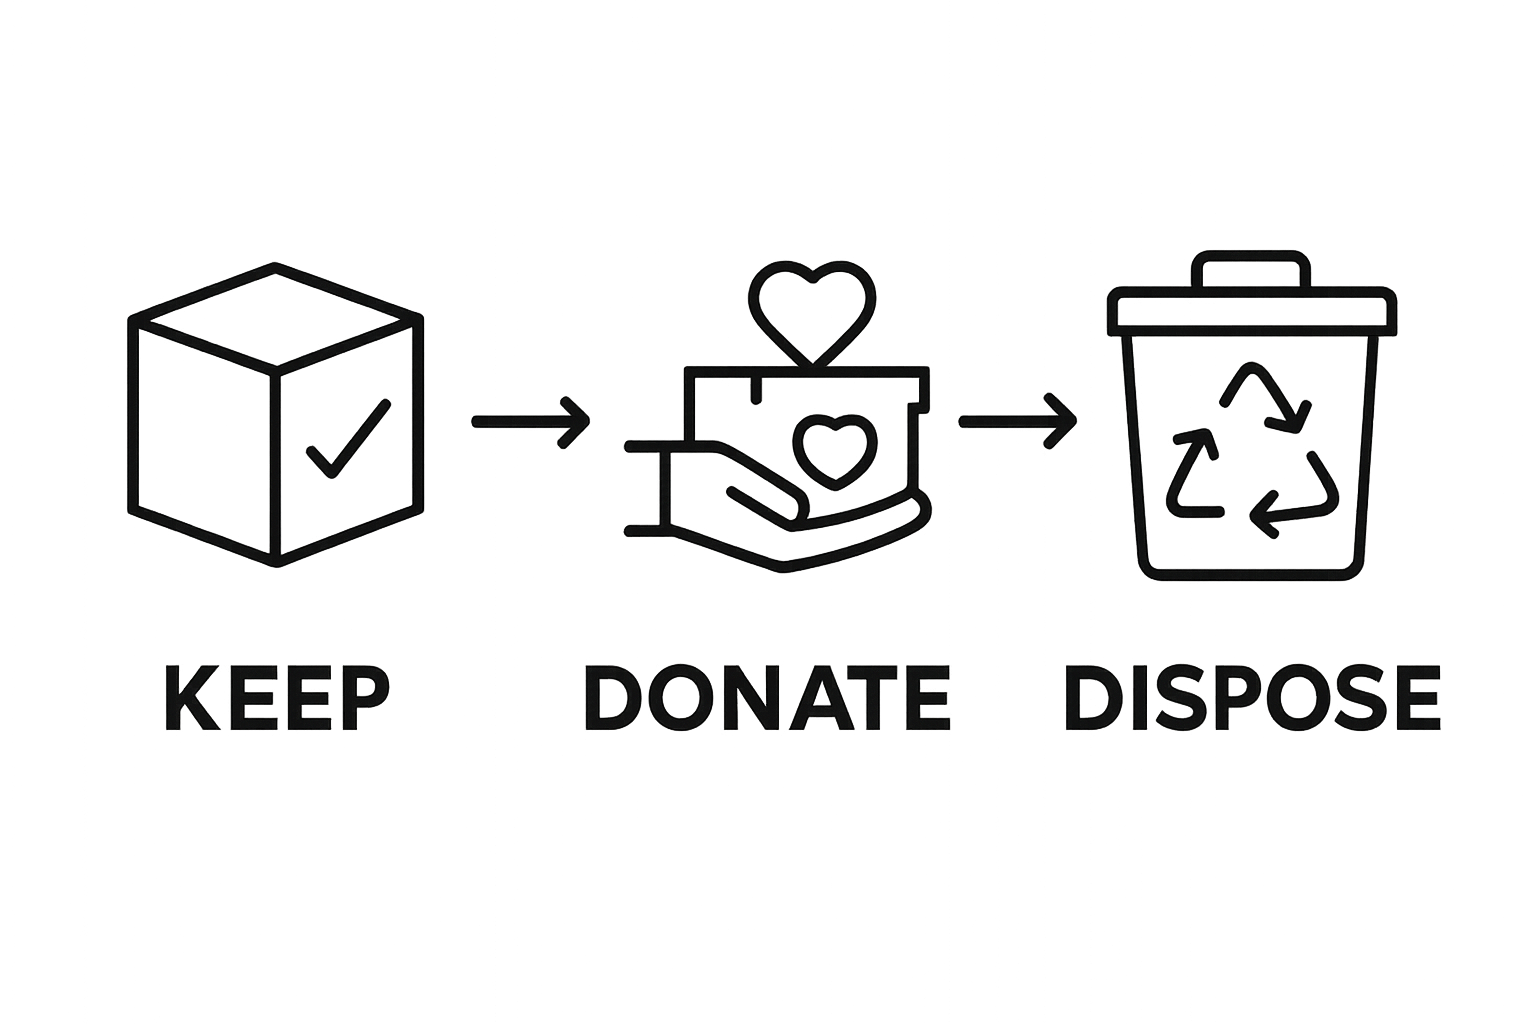
- Step 3: Categorize Items For Disposal, Donation, Or Keep
- Step 4: Organize A Cleanout Day With Essential Supplies
- Step 5: Execute The Cleanout And Remove Items
- Step 6: Verify Space Is Clutter-Free And Set Up For Success
Quick Summary
| Key Point | Explanation |
|---|---|
| 1. Assess your office for clutter | Conduct a thorough assessment to identify areas needing decluttering. Focus on items that haven’t been used recently and maximize organization efficiency. |
| 2. Set specific cleanout goals | Define measurable objectives, like reducing storage and eliminating outdated equipment. This provides a clear direction and tracks progress throughout the cleanout. |
| 3. Categorize items for sorting | Sort items into three groups: keep, donate, and dispose. This systematic approach helps make informed decisions on what to retain or eliminate. |
| 4. Prepare for cleanout day | Gather necessary supplies and communicate well with your team, ensuring everyone knows their roles and the schedule for the cleanout. |
| 5. Verify and optimize space post-cleanout | Conduct a walkthrough to ensure the space is organized. Establish a maintenance protocol to keep the office clutter-free and efficient moving forward. |
Step 1: Assess Your Office Space for Clutter
Conducting a thorough assessment of your office space is the critical first step in executing effective office cleanout strategies. This foundational process helps you understand the scope of your decluttering project and develop a targeted approach that maximizes efficiency and minimizes disruption to your workflow.
Begin by walking through your entire office with a critical eye, documenting areas of accumulated clutter and unnecessary items. Pay special attention to common problem zones such as file cabinets, storage rooms, desk drawers, shelving units, and shared collaborative spaces. Look for items that have not been used in the past year, duplicate equipment, outdated documents, and furniture pieces that no longer serve a functional purpose.
As you survey the space, create a systematic inventory categorizing items into three primary groups: keep, donate/sell, and discard. This method allows you to make strategic decisions about each item’s future. For electronic and physical documents, implement a ruthless culling process. Scan and digitize important papers that can be stored electronically, and securely shred confidential materials that are no longer needed. Our guide on office organization can provide additional insights into efficient sorting techniques.
Consider the practical implications of each item you encounter. Ask yourself key questions: Does this support current business operations? Will this be relevant in the next six to twelve months? Is the item in good working condition? By maintaining a pragmatic perspective, you can make informed decisions that streamline your office environment and create more functional workspaces.
To effectively complete this assessment, allocate dedicated time without interruptions. Schedule a block of 2-3 hours where you can methodically work through each area, taking detailed notes and making deliberate choices about item retention. Your goal is not just removing clutter but creating a more productive, organized office environment that supports your team’s efficiency and professional image.
Step 2: Create a Cleanout Plan with Specific Goals
Developing a comprehensive cleanout plan transforms your office decluttering from a chaotic process into a strategic, manageable project. The key is to create a structured approach that breaks down the overwhelming task into clear, achievable objectives that align with your organization’s operational needs and space optimization goals.
Start by defining precise, measurable goals for your office cleanout. These might include reducing storage space by 30%, eliminating outdated equipment, creating more collaborative work areas, or improving overall office efficiency. Quantifiable targets provide clear direction and help you track progress throughout the cleanout process. Learn more about effective organizational strategies to support your planning efforts.
Timeline development is crucial in your cleanout strategy. Establish a realistic schedule that considers your business operations, minimizing disruption to daily workflows. Divide the project into manageable phases, allocating specific timeframes for different areas or types of items. For instance, you might dedicate one week to document digitization, another to furniture assessment, and a final week for final disposal and reorganization.
Budget considerations play a significant role in your cleanout plan. Estimate potential costs associated with document shredding, equipment disposal, storage solutions, and potential professional removal services. Create a detailed budget that accounts for unexpected expenses and includes potential revenue from selling usable office equipment or furniture. This financial planning ensures you can execute your cleanout strategy without unexpected financial strain.
Effective communication is the backbone of a successful cleanout plan. Brief your team about the upcoming process, explaining the goals, timeline, and their potential roles. Assign specific responsibilities to team members, creating accountability and ensuring everyone understands their part in the office transformation. By involving your entire team, you create a collaborative approach that makes the cleanout process more efficient and less stressful.
Step 3: Categorize Items for Disposal, Donation, or Keep
Categorizing office items is a pivotal moment in your cleanout strategy, requiring careful consideration and systematic decision making. This critical step transforms your cluttered space into a streamlined, purposeful environment by helping you make informed choices about each item’s future.
Establish three distinct zones for your sorting process: keep, donate, and disposal. Approach each item with a critical eye, evaluating its current utility, potential future value, and condition. For items in the keep category, ensure they directly support your current business operations or have immediate strategic value.
 Electronics, functional furniture, and recent office supplies typically qualify for retention. Check out our comprehensive guide for disposal strategies to refine your categorization process.
Donation presents an excellent opportunity to support local nonprofits or educational institutions while responsibly managing your office inventory. Seek out organizations that accept gently used office furniture, functioning computer equipment, and surplus office supplies. Many local schools, community centers, and emerging businesses appreciate professional-grade equipment that might no longer serve your specific needs. Contact potential recipient organizations in advance to understand their acceptance criteria and donation procedures.
For items designated for disposal, develop a responsible removal strategy. Prioritize environmentally conscious disposal methods, such as electronic waste recycling for outdated technology, proper document shredding for confidential materials, and partnering with professional junk removal services that emphasize sustainable practices. Some office equipment and furniture might have resale value, so consider online marketplaces or local business liquidation services as potential alternatives to direct disposal.
As you progress through categorization, maintain a detailed inventory spreadsheet documenting each item’s designation, estimated value, and intended destination. This systematic approach not only helps track your progress but also provides a clear record for potential tax deductions related to donations and helps you understand the true scope of your office cleanout project.
Step 4: Organize a Cleanout Day with Essential Supplies
A successful office cleanout day requires meticulous planning and the right collection of supplies to transform your workspace efficiently. This pivotal day represents the culmination of your previous preparation, where strategic organization meets practical execution.
Gather your essential cleanout toolkit before the designated day. This includes heavy-duty trash bags, recycling containers, label makers, marker sets, protective gloves, packing tape, document shredders, and sturdy moving boxes. Explore our comprehensive cleanout preparation guide for additional insights into effective supply management. Ensure you have multiple stations set up throughout the office to facilitate smooth sorting and minimize disruption to workflow.
Communicate the cleanout day plan comprehensively with your entire team. Send multiple reminders explaining the process, expected participation, and specific responsibilities. Create a detailed schedule that breaks down the day into manageable segments, allocating specific time blocks for different areas or departments. This approach prevents overwhelming staff and ensures systematic progress. Consider providing light refreshments and creating a supportive, collaborative atmosphere that makes the cleanout feel like a team-building experience rather than a tedious task.
Prepare digital and physical tracking systems to monitor your progress. Use spreadsheets or dedicated project management tools to log items being removed, donated, or discarded. Take before and after photographs to document the transformation and provide visual motivation for your team. Establish clear protocols for handling sensitive documents, electronic equipment, and valuable office assets. Designate specific team members to oversee critical aspects of the cleanout, ensuring accountability and preventing potential loss or mishandling of important materials.
At the conclusion of your cleanout day, conduct a thorough review of completed tasks. Verify that all designated areas have been processed, items have been correctly categorized, and the workspace reflects your initial organizational goals.
Below is a table summarizing essential supplies needed for a successful office cleanout day, along with their purpose and any related notes.
| Supply | Purpose | Notes |
|---|---|---|
| Heavy-duty trash bags | Collect general waste | Opt for large, sturdy bags to avoid breakage |
| Recycling containers | Separate recyclables | Label clearly for paper, plastics, etc. |
| Label maker | Identify boxes and containers | Ensures accurate sorting |
| Markers | Mark boxes and categorize items | Use different colors for clarity |
| Protective gloves | Ensure safety while handling items | Prevents cuts and exposure to dirt |
| Packing tape | Seal boxes and secure items | Choose strong tape for heavy boxes |
| Document shredder | Securely destroy confidential documents | Use for outdated or sensitive paperwork |
| Moving boxes | Pack items for donation, removal, or storage | Use various sizes for different items |
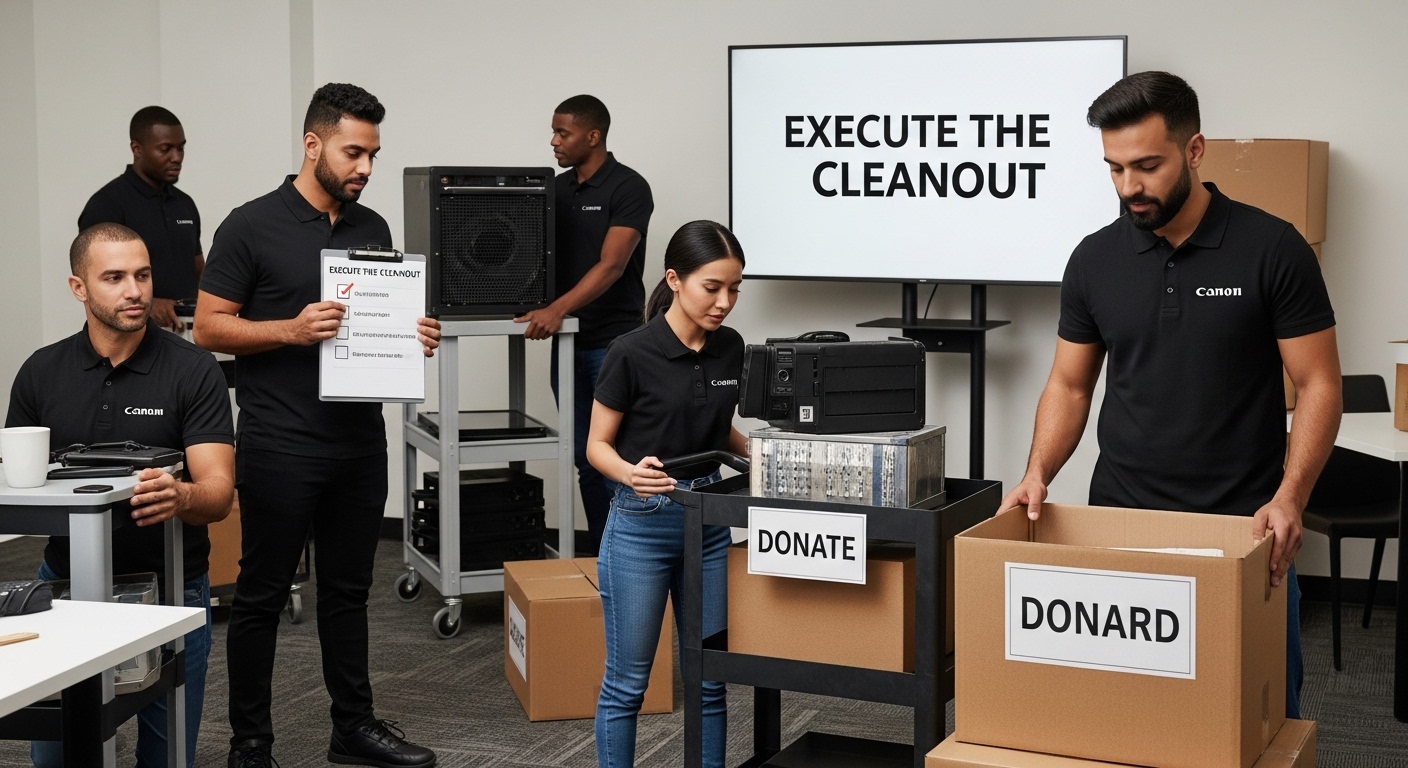
Step 5: Execute the Cleanout and Remove Items
Executing your office cleanout requires precision, systematic approach, and careful coordination to transform your workspace efficiently. This critical stage transforms your meticulous planning into tangible results, removing unnecessary items while preserving the functional integrity of your office environment.
Begin with a strategic removal process that prioritizes minimal disruption to daily operations. Start in less critical areas like storage rooms, supply closets, and shared spaces before moving to more active work zones. Sort items quickly and decisively, placing them into designated removal categories. Explore our professional removal strategies to optimize your cleanout efficiency. Ensure heavy or bulky items are handled safely, using proper lifting techniques or professional assistance to prevent workplace injuries.
Prepare for responsible item disposal by researching local regulations and environmental guidelines. Electronic waste, confidential documents, and specialized office equipment often require specific disposal methods. Contact local recycling centers, donation organizations, and waste management services to understand their specific requirements. For electronic items, seek certified e-waste recycling facilities that can securely destroy data and process components environmentally. Many nonprofit organizations welcome functional office furniture and equipment, providing an opportunity to support community initiatives while responsibly managing your cleanout.
Implement a systematic documentation process throughout the removal phase. Photograph items before removal, maintain detailed inventory logs, and track the destination of each category of items. This documentation serves multiple purposes: providing potential tax deduction evidence for donations, ensuring accountability, and creating a comprehensive record of your office transformation. Consider creating a digital spreadsheet that tracks each item’s original location, condition, and final disposition.
Conduct a final walkthrough after item removal to verify complete execution of your cleanout plan. Check that all designated areas have been processed, verify no unwanted items remain, and assess the newfound space and organizational improvements. Gather feedback from team members about the process, identifying potential improvements for future office management and cleanout strategies.
Step 6: Verify Space is Clutter-Free and Set Up for Success
Verifying and optimizing your newly decluttered office space represents the critical final stage of your transformation journey. This comprehensive review ensures that your meticulous cleanout efforts translate into a functional, efficient workspace that supports productivity and professional growth.
Conduct a systematic walkthrough of the entire office, examining each area with a critical eye. Compare the current state against your original organizational goals, checking that every zone reflects the intended purpose and efficiency. Explore our comprehensive office organization guide for additional optimization strategies. Look for potential improvements in workflow, storage solutions, and spatial arrangement that might have been overlooked during the initial cleanout process.
Implement a thoughtful reorganization strategy that maximizes the newly created space. Invest in smart storage solutions that maintain the clean, streamlined environment you’ve achieved. Consider ergonomic furniture arrangements that promote collaboration while preserving individual workspace functionality. Install labeled storage containers, invest in digital organization tools, and create designated areas for frequently used equipment and supplies. This approach prevents future clutter accumulation and establishes a sustainable organizational system.
Develop a maintenance protocol to preserve your office’s newfound efficiency. Create clear guidelines for team members about maintaining the organized space, including protocols for introducing new items, regular assessment schedules, and accountability measures. Schedule quarterly review sessions to evaluate the office’s organizational health, allowing for continuous improvement and preventing gradual clutter reaccumulation. Encourage team members to adopt a minimalist approach to workspace management, emphasizing the benefits of a clean, well-organized environment for productivity and professional image.
Conclude your cleanout process by documenting the transformation. Take comprehensive before and after photographs, create a detailed report of items removed and reorganized, and share the success with your team.
The following table provides a checklist of recommended verification steps to ensure your office remains clutter-free and optimized after cleanout.
| Verification Step | Description | Frequency |
|---|---|---|
| Conduct office walkthrough | Inspect each area to ensure goals are met | After cleanout, quarterly |
| Compare with organizational goals | Ensure every zone reflects intended purpose and efficiency | After cleanout |
| Reorganize storage and work areas | Maximize space with labeled containers and ergonomic layout | After cleanout |
| Develop maintenance protocol | Establish guidelines for keeping the office organized | Immediately after |
| Schedule regular review sessions | Assess and adjust organizational systems | Quarterly |
| Document transformation | Take before/after photos, log removed/reorganized items | After cleanout |
| Celebrate and acknowledge team effort | Recognize contributions and discuss lessons learned | After cleanout |
Ready to Transform Your Office With a Seamless Cleanout?
If preparing for a major office cleanout feels overwhelming, you are not alone. The strategies in this article show how clutter blocks productivity and how difficult it can be to schedule disposal, organize items, and keep business running smoothly. Many Connecticut businesses struggle to find reliable solutions for bulky junk, confidential records, outdated electronics, or heavy furniture. Sorting and disposing responsibly—while protecting workflow—can be stressful and time consuming.
Let us take the hassle and guesswork out of your cleanout process. At CMC Carting Solutions, we offer tailored junk removal and disposal services to help you achieve your organizational goals for 2025 and beyond. Our team manages everything from furniture removal to secure hauling of outdated electronics and confidential materials. You can schedule with just a few clicks, benefit from our transparent pricing, and rely on local professionals who understand your specific challenges.
Turn your office cleanout strategy into real progress—without disruption. Request your quick quote now and discover why Litchfield County businesses trust us for efficiency, safety, and peace of mind.
Frequently Asked Questions
What are the initial steps to take before starting an office cleanout?
Begin with a thorough assessment of your office space to identify clutter and areas needing attention. Document problem zones, categorize items into ‘keep’, ‘donate/sell’, and ‘discard’ groups, and plan your cleanout strategy accordingly.
How can I create an effective cleanout plan for my office?
Define specific, measurable goals for the cleanout process. Develop a timeline that minimizes disruption to business operations and consider your budget for disposal and donation initiatives. Assign roles to team members to ensure accountability and collaboration during the project.
What types of items should be kept during an office cleanout?
Keep items that support current business operations, such as functional furniture, equipment, and essential supplies that are likely to be relevant in the near future. Evaluate each item’s condition and utility to make informed decisions about what to retain.
How do I responsibly dispose of electronic waste during an office cleanout?
Research local regulations for the disposal of electronic items. Use certified e-waste recycling facilities to ensure secure data destruction and environmentally-friendly processing. Consider donating functional electronics to local nonprofits to support community initiatives.