Massive storms can leave whole neighborhoods buried under fallen branches, shattered glass, and tangled power lines. Some disasters produce more than 200,000 tons of debris in a single event. Most people rush to clean up as fast as possible, thinking speed will solve everything. But a rushed approach might actually turn a bad situation worse. Knowing how to assess, document, and clear debris safely can protect both your property and your peace of mind.
Table of Contents
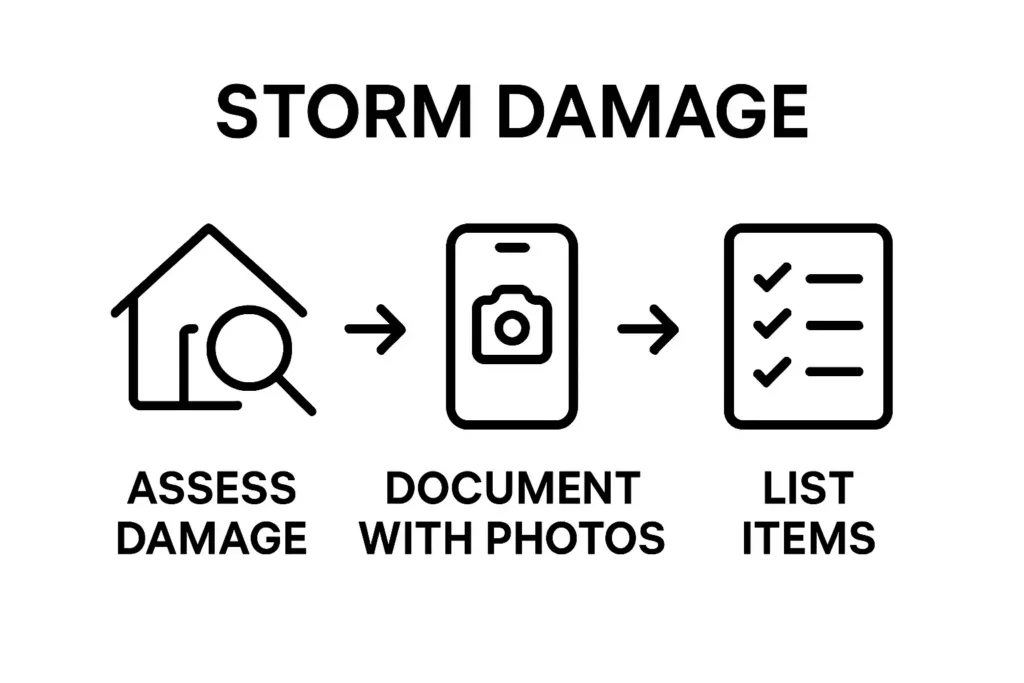
- Step 1: Assess Your Property For Debris Damage
- Step 2: Gather Necessary Safety Equipment
- Step 3: Document The Damage For Insurance Claims
- Step 4: Prioritize Areas For Debris Removal
- Step 5: Execute Debris Removal Safely And Effectively
- Step 6: Verify Completion And Arrange For Disposal
Quick Summary
| Key Point | Explanation |
|---|---|
| 1. Assess Property for Hazards | Conduct a thorough evaluation of your property to identify safety hazards and document damage before cleanup begins. |
| 2. Gather Essential Safety Gear | Equip yourself with protective equipment, such as gloves, hard hats, and steel-toed boots, to minimize injury risks during debris removal. |
| 3. Document Damage for Claims | Capture high-resolution photos and create a detailed inventory of all damaged items for insurance purposes, ensuring you have supporting evidence. |
| 4. Prioritize Debris Removal Areas | Focus on removing debris that presents immediate safety risks or has the potential for progressive structural damage to your property. |
| 5. Verify Cleanup Completion Thoroughly | After removal, conduct a meticulous inspection of your property to ensure all debris is cleared and properly disposed of according to local regulations. |
Step 1: Assess Your Property for Debris Damage
After a severe storm, emergency storm debris removal begins with a comprehensive property assessment. Understanding the extent of damage is crucial for creating an effective cleanup strategy and ensuring your safety. Before you start removing debris, carefully examine your entire property to identify potential hazards and document the damage.
Safety First: Personal Protection
Start by preparing yourself with appropriate protective gear. Put on sturdy work boots, thick gloves, long pants, and a long-sleeved shirt to protect against sharp debris, broken glass, and potential contamination. A hard hat and safety glasses provide additional protection against falling branches or loose debris. If electrical lines are down or there are signs of structural damage, wait for professional assistance before approaching potentially dangerous areas.
Systematic Property Inspection
Begin your assessment systematically by walking around your property’s perimeter. Check your roof for damaged shingles, fallen branches, or structural compromises. Examine trees for broken limbs hanging precariously that could fall unexpectedly. Look for debris scattered across your yard, including broken fence sections, scattered outdoor furniture, and potential hazardous materials like broken glass or exposed metal.
Pay special attention to areas near structures. Check your home’s foundation, windows, and exterior walls for damage. Look for cracks, displaced siding, or areas where debris might have punctured walls or created potential entry points for water. Take detailed photographs of all damage for insurance purposes and potential property restoration services.
Documenting your findings is critical. Create a detailed inventory of debris types and potential risks. This inventory will help you prioritize removal tasks and communicate effectively with cleanup professionals. Remember that some debris might require specialized handling, especially if it includes potentially hazardous materials like broken electrical equipment or contaminated items.
If you encounter extensive damage or feel overwhelmed, do not hesitate to contact professional emergency storm debris removal services. They can provide expert assessment and safe removal strategies that protect both your property and personal safety.
Step 2: Gather Necessary Safety Equipment
Successful emergency storm debris removal requires more than good intentions. Proper safety equipment protects you from potential injuries and environmental hazards during cleanup operations. Before touching any storm debris, assembling the right protective gear is absolutely critical to your personal safety and effectiveness.
Essential Personal Protective Equipment
Your safety gear should create a comprehensive barrier between you and potential dangers. Start with a sturdy pair of work gloves that extend past your wrists, preferably made from cut-resistant materials like leather or heavy-duty synthetic fabrics. These will protect your hands from sharp metal edges, broken glass, and splintered wood. Choose gloves with reinforced palms to provide additional grip and durability during heavy lifting and debris manipulation.
Protect your head and face with a rigid construction hard hat that meets ANSI safety standards. This will shield you from falling branches, loose debris, or accidental impacts. Safety glasses or a full-face shield are equally important, preventing dust, small particles, and potential projectiles from causing eye injuries. For respiratory protection, select a high-quality dust mask or respirator rated for particulate filtering, especially when dealing with potentially moldy or contaminated debris.
Your clothing choices matter significantly. Wear long-sleeved shirts and long pants made from thick, durable materials like denim or canvas. These provide protection against cuts, scrapes, and potential chemical exposures. Opt for steel-toed work boots with slip-resistant soles to navigate uneven terrain safely. Consider wearing high-visibility clothing or a reflective vest if working near roadways or in low-light conditions.
Additional recommended equipment includes a sturdy first aid kit, work-appropriate hearing protection if using power tools, and potentially waterproof clothing if working in wet conditions. Our property cleanup guide recommends keeping a mobile phone accessible for emergency communications.
Equipment Verification Checklist
- Leather work gloves with reinforced grip
- ANSI-certified hard hat
- Safety glasses or face shield
- N95 or higher-rated respirator mask
- Long-sleeved shirt and long pants
- Steel-toed work boots
- First aid kit
- High-visibility vest
Before beginning any debris removal, double-check that all your safety equipment fits properly and is free from visible damage. Remember, investing a few minutes in proper preparation can prevent hours or even weeks of potential medical treatment.
Below is a table summarizing the essential personal protective equipment required for safe storm debris removal, along with brief notes on their purpose.
| Safety Equipment | Purpose and Notes |
|---|---|
| Leather work gloves | Protect hands from glass, metal, and splintered wood debris |
| ANSI-certified hard hat | Shields head from falling or shifting debris |
| Safety glasses/face shield | Prevents eye injury from dust, particles, and projectiles |
| N95 respirator mask | Filters dust and particulates, especially around mold or contaminants |
| Long sleeves and pants | Guards against cuts, scrapes, and chemicals |
| Steel-toed work boots | Protects feet from heavy debris and sharp objects |
| High-visibility vest | Increases safety when working near roads or in low-visibility areas |
| First aid kit | Provides immediate care for minor injuries during cleanup |
Step 3: Document the Damage for Insurance Claims
After a destructive storm, thorough documentation becomes your financial lifeline. Insurance claims require meticulous evidence that captures the full extent of your property damage. Your goal is to create a comprehensive visual and written record that supports your potential reimbursement and helps expedite the recovery process.
Comprehensive Visual Documentation
Begin by capturing high-resolution photographs and videos of every damaged area. Use natural daylight and ensure your images are clear and well-lit. Walk through your property systematically, starting from the exterior and moving inside. Photograph wide-angle shots that show overall damage, then zoom in for detailed close-ups of specific damage points. Important: Take pictures before moving or removing any debris to maintain the most accurate representation of storm impact.
Focus on capturing detailed images of structural damage, including roof shingles, broken windows, damaged siding, and compromised foundations. For interior spaces, document water stains, cracks, displaced furniture, and damaged personal belongings. Use your smartphone or digital camera to create a time-stamped visual inventory. If possible, use a measuring object like a ruler or tape measure in your photographs to provide scale and context for insurance adjusters.
Detailed Damage Inventory
Along with visual documentation, create a written inventory of all damaged items. According to FEMA guidelines, your list should include specific details for each item:
- Item description and condition
- Estimated age of the item
- Original purchase price
- Approximate replacement cost
- Serial numbers for electronics and appliances
- Photographs of each damaged item
Organize your documentation systematically. Create a digital folder with clearly labeled images and corresponding written descriptions. Make multiple backups of your documentation, storing copies in cloud storage and on an external hard drive. Contact your insurance provider promptly to understand their specific documentation requirements and initiate the claims process.
Remember that thorough, organized documentation can significantly impact your ability to receive fair compensation. Take your time, be methodical, and treat this process as a critical step in your storm recovery journey.
Step 4: Prioritize Areas for Debris Removal
Effective emergency storm debris removal requires a strategic approach that balances safety, urgency, and practical considerations. Your goal is to systematically identify and address the most critical areas of damage while minimizing potential risks to your property and personal safety.
Critical Damage Assessment Strategy
Begin by identifying areas that pose immediate safety threats or potential structural risks. Focus first on debris near power lines, hanging branches that could fall, and items blocking essential access points like driveways, walkways, and emergency exits. Pay special attention to locations where debris might compromise your home’s structural integrity or create potential water damage entry points. Prioritize sections that could lead to secondary damage if not addressed quickly, such as roof damage that might allow water infiltration or broken windows that expose your interior to further environmental risks.
When evaluating your property, create a mental map that categorizes debris removal priorities. Start with areas that present the most significant safety hazards, then move to locations that could cause progressive damage if left unattended. This might include checking your roof for compromised shingles, examining exterior walls for potential structural impacts, and assessing potential water drainage issues created by storm debris.
Consider the specific characteristics of different debris types. Organic materials like tree branches and leaves decompose differently from construction materials or metal debris. Some items require specialized handling, particularly if they contain potentially hazardous substances. Our comprehensive debris removal guide can help you understand the nuanced approach needed for various debris types.
Debris Removal Priority Checklist
- Immediate safety hazards (hanging branches, exposed electrical lines)
- Potential structural damage points
- Blocked access routes and emergency exits
- Areas vulnerable to water damage
- Exterior property perimeter
- Interior spaces with debris infiltration
Document your prioritization process as you go. Take photographs of each area before and after removal, which will help with insurance claims and provide a clear record of your systematic approach. Remember that while thorough documentation is important, your personal safety remains the ultimate priority. If any debris removal task seems too dangerous or complex, do not hesitate to contact professional emergency storm debris removal services who can handle more challenging scenarios safely and efficiently.
Step 5: Execute Debris Removal Safely and Effectively
With your property assessed and safety equipment prepared, the actual debris removal process requires careful execution. Emergency storm debris removal is not just about clearing your property but doing so in a manner that minimizes additional risks and potential injuries.
Strategic Removal Techniques
Begin by clearing smaller debris first, creating pathways that allow easier movement for larger item removal. Use a systematic approach, working from the exterior of your property inward. When lifting heavy items, always bend at your knees and keep your back straight to prevent potential muscle strain. Team lifting is crucial for items weighing more than 50 pounds. If possible, work with a partner who can help distribute weight and provide immediate assistance if complications arise.
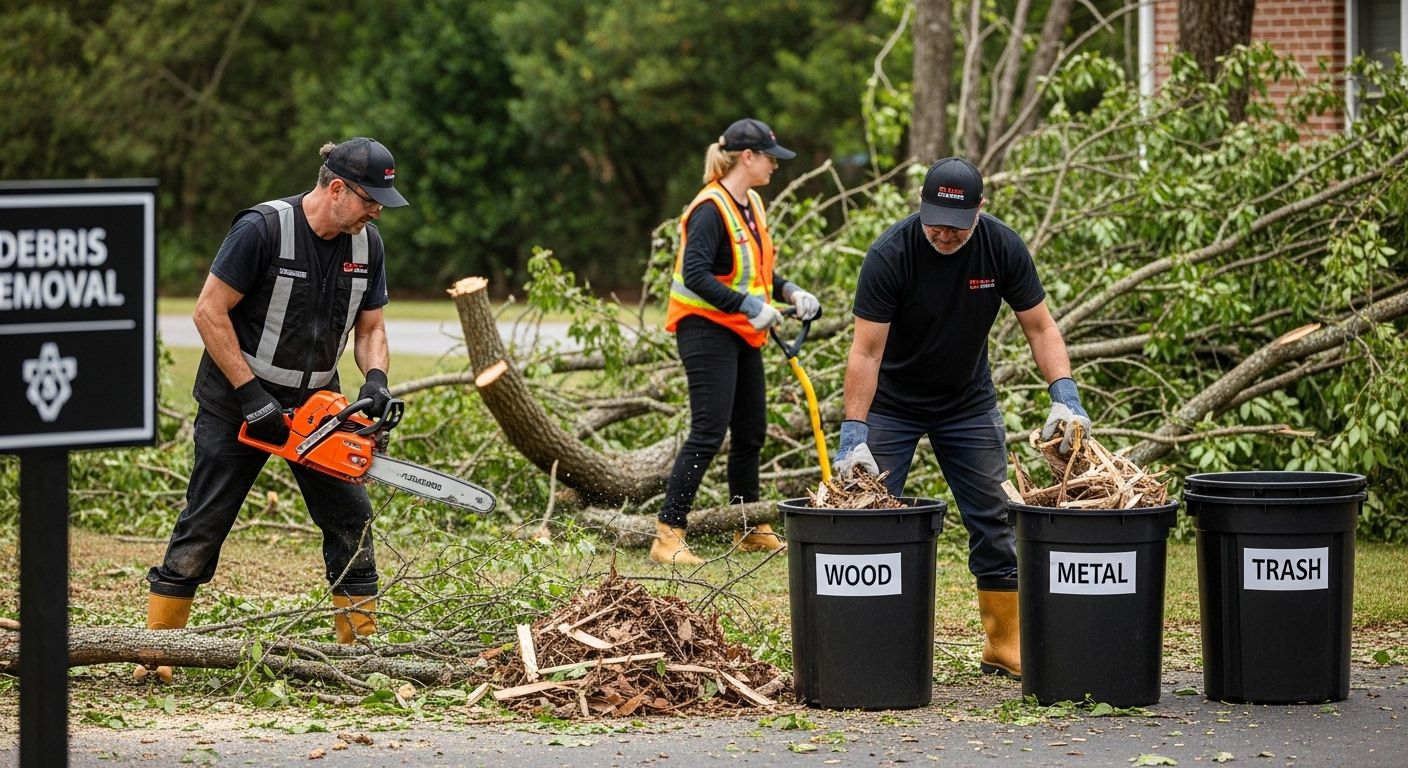
Different types of debris require unique handling strategies. Wooden branches and organic materials can often be cut into manageable sections using pruning tools or a chainsaw. Metal debris might need specialized cutting tools or professional assistance. Whenever dealing with potentially hazardous materials like broken glass, electrical components, or items with sharp edges, proceed with extreme caution. Explore our detailed debris management techniques for more comprehensive guidance on handling complex removal scenarios.
Implement a sorting system as you remove debris. Create separate staging areas for different material types such as organic waste, construction materials, and potentially hazardous items. This approach not only facilitates easier disposal but also supports potential recycling or specialized waste management processes. Be mindful of local regulations regarding debris disposal, as some materials may require specific handling or cannot be placed in standard waste containers.
Debris Removal Safety Checklist
- Lift heavy items with proper technique
- Use team lifting for substantial objects
- Sort debris by material type
- Maintain clear work pathways
- Keep first aid kit readily accessible
- Take regular breaks to prevent exhaustion
- Stay hydrated during cleanup efforts
Carefully document your progress through photographs and notes. This documentation serves multiple purposes: tracking your cleanup efforts, supporting potential insurance claims, and providing a clear record of the storm’s impact. Remember that while thorough cleanup is important, your personal safety remains the paramount concern. If any debris removal task seems beyond your capabilities or presents significant risks, do not hesitate to contact professional emergency storm debris removal services who can handle complex scenarios safely and efficiently.
Step 6: Verify Completion and Arrange for Disposal
The final stage of emergency storm debris removal requires a methodical approach to ensure your property is thoroughly cleared and waste is disposed of responsibly. This critical step transforms your chaotic post-storm landscape into a clean, safe environment while adhering to local waste management regulations.
Comprehensive Property Inspection
Begin with a meticulous walkthrough of your entire property, examining every area where debris was previously located. Pay close attention to subtle details that might have been overlooked during initial removal efforts. Check corners, under bushes, along fence lines, and in less visible areas where smaller debris might have accumulated. Use natural light to your advantage, walking the property during daylight hours to spot any remaining fragments or potential hazards that could have been missed during the initial cleanup.
Take systematic photographs documenting the cleared areas, comparing them with your initial damage assessment images. This visual documentation serves multiple purposes: confirming the thoroughness of your debris removal, providing potential insurance documentation, and creating a record of your property’s recovery process. Look for any signs of landscape damage that might require additional attention, such as soil erosion, damaged vegetation, or areas where heavy debris might have compressed the ground.
Explore our comprehensive disposal guidelines to understand the nuanced requirements for different types of storm debris. Different materials demand specific disposal methods. Organic debris like tree branches might be eligible for municipal composting programs, while construction materials could require specialized waste management services. Contact your local waste management authorities to confirm specific guidelines for storm debris disposal in your area.
Final Disposal Verification Checklist
- Confirm all debris is completely removed
- Photograph cleared property areas
- Separate debris by material type
- Contact local waste management authorities
- Verify disposal method for each debris category
- Assess potential landscape restoration needs
- Retain all documentation for insurance purposes
As a final step, organize all your documentation systematically. Compile your before and after photographs, debris removal notes, and any communication with local authorities or waste management services. This comprehensive approach not only ensures a thorough cleanup but also provides a professional record of your storm recovery efforts.
The following table provides a checklist summarizing the final verification steps you should follow to ensure complete debris removal and responsible disposal.
| Task | Description/Action |
|---|---|
| Confirm all debris is removed | Walk property to spot and collect any remaining fragments |
| Photograph cleared areas | Capture before and after pictures for your records |
| Separate debris by material type | Organize into organic, construction, or hazardous categories |
| Contact local waste management | Check disposal regulations and arrange required services |
| Verify disposal method for each category | Ensure proper handling based on material type |
| Assess landscape restoration | Identify soil or vegetation damage needing further attention |
| Retain all documentation | Organize receipts, communications, and cleanup photographs |
Take the Stress Out of Emergency Storm Debris Removal
Sudden storms can leave you feeling overwhelmed as you face broken branches, scattered debris, and urgent safety concerns. The article highlights how important it is to protect your property, document damage for insurance, and prioritize your cleanup. Yet tackling these steps alone can be stressful and risky, especially when you need fast results and safe debris handling. Many homeowners struggle with heavy lifting, disposing of hazardous materials, and meeting local waste regulations after a storm.
Let our local experts make your recovery easy. Partner with a trusted, community-focused team who puts your safety and peace of mind first. From guiding your property cleanup to responsible debris disposal, we handle every detail so you can focus on moving forward. Ready to clear your property quickly and restore order? Get immediate help today with a hassle-free quote from our secure online form. Take action now, reclaim your space, and let us do the heavy lifting.
Frequently Asked Questions
What should I do first after a storm hits my property?
Start by assessing your property for debris damage. Document any damage and identify potential hazards before beginning cleanup. Ensure your safety by wearing appropriate protective gear.
What safety equipment do I need for debris removal?
Essential safety equipment includes sturdy work gloves, safety glasses, a hard hat, an N95 dust mask, long pants and sleeves, and steel-toed work boots. Always verify that your gear fits properly and is in good condition.
How do I document storm damage for insurance claims?
Take high-resolution photographs and videos of all damaged areas before removing any debris. Create a detailed written inventory of affected items, including descriptions, estimated ages, and original costs, to support your claims.
What is the best way to prioritize areas for debris removal?
Begin by addressing immediate safety hazards, such as hanging branches or debris near power lines. Then, focus on areas that could cause structural damage or block access points. Creating a mental map of priorities will assist in efficient cleanup.